关系型系统之Mysql安装配置教程
MySQL,目前在中小企业大受欢迎,其成本低廉,而且所使用的编程语言都是简单易懂,稍稍懂得mysql原理的同学都可以进行简单的编程。
MySQL是最流行的关系型数据库管理系统,由瑞典MySQLAB公司开发,目前属于Oracle公司。
MySQL所使用的SQL语言是用于访问数据库的最常用标准化语言。
MySQL由于其体积小、速度快、总体拥有成本低,尤其是开放源码这一特点,一般中小型网站的开发都选择MySQL作为网站数据库。
MySQL安装
本教程的系统平台:CentOSrelease6.6(Final)64位。
一、安装编译工具及库文件
yum-yinstallgccgcc-c++makeautoconflibtool-ltdl-develgd-develfreetype-devellibxml2-devellibjpeg-devellibpng-developenssl-develcurl-develbisonpatchunziplibmcrypt-devellibmhash-develncurses-develsudobzip2flexlibaio-devel
二、安装cmake编译器
cmake版本:cmake-3.1.1。
1、下载地址:http://www.cmake.org/files/v3.1/cmake-3.1.1.tar.gz
[[email protected],ccsrc]#wgethttp://www.cmake.org/files/v3.1/cmake-3.1.1.tar.gz

2、解压安装包
[[email protected],ccsrc]#tarzxvfcmake-3.1.1.tar.gz
3、进入安装包目录
[[email protected],ccsrc]#cdcmake-3.1.1
4、编译安装
[[email protected],cccmake-3.1.1]#./bootstrap[[email protected],cccmake-3.1.1]#make&&makeinstall
三、安装MySQL
MySQL版本:mysql-5.6.15。

1、下载地址:http://dev.mysql.com/get/Downloads/MySQL-5.6/mysql-5.6.15.tar.gz
[[email protected],ccsrc]#wgethttp://dev.mysql.com/get/Downloads/MySQL-5.6/mysql-5.6.15.tar.gz
2、解压安装包
[[email protected],ccsrc]#tarzxvfmysql-5.6.15.tar.gz
3、进入安装包目录
[[email protected],ccsrc]#cdmysql-5.6.15
4、编译安装
[[email protected],ccmysql-5.6.15]#cmake-DCMAKE_INSTALL_PREFIX=/usr/local/webserver/mysql/-DMYSQL_UNIX_ADDR=/tmp/mysql.sock-DDEFAULT_CHARSET=utf8-DDEFAULT_COLLATION=utf8_general_ci-DWITH_EXTRA_CHARSETS=all-DWITH_MYISAM_STORAGE_ENGINE=1-DWITH_INNOBASE_STORAGE_ENGINE=1-DWITH_MEMORY_STORAGE_ENGINE=1-DWITH_READLINE=1-DWITH_INNODB_MEMCACHED=1-DWITH_DEBUG=OFF-DWITH_ZLIB=bundled-DENABLED_LOCAL_INFILE=1-DENABLED_PROFILING=ON-DMYSQL_MAINTAINER_MODE=OFF-DMYSQL_DATADIR=/usr/local/webserver/mysql/data-DMYSQL_TCP_PORT=3306[[email protected],ccmysql-5.6.15]#make&&makeinstall
5、查看mysql版本:
[[email protected],ccmysql-5.6.15]#/usr/local/webserver/mysql/bin/mysql–version

到此,mysql安装完成。
MySQL配置
1、创建mysql运行使用的用户mysql:
[[email protected]]#/usr/sbin/groupaddmysql[[email protected]]#/usr/sbin/useradd-gmysqlmysql
2、创建binlog和库的存储路径并赋予mysql用户权限
[[email protected],ccmysql]#mkdir-p/usr/local/webserver/mysql/binlog/www/data_mysql[[email protected],ccmysql]#chownmysql.mysql/usr/local/webserver/mysql/binlog//www/data_mysql/
2、创建my.cnf配置文件
将/etc/my.cnf替换为下面内容
[[email protected],ccmysql]#cat/etc/my.cnf[client]port=3306socket=/tmp/mysql.sock[mysqld]replicate-ignore-db=mysql
replicate-ignore-db=test
replicate-ignore-db=information_schema
user=mysql
port=3306socket=/tmp/mysql.sock
basedir=/usr/local/webserver/mysql
datadir=/www/data_mysql
log-error=/usr/local/webserver/mysql/mysql_error.log
pid-file=/usr/local/webserver/mysql/mysql.pid
open_files_limit=65535back_log=600max_connections=5000max_connect_errors=1000table_open_cache=1024external-locking=FALSE
max_allowed_packet=32Msort_buffer_size=1Mjoin_buffer_size=1Mthread_cache_size=600#thread_concurrency=8query_cache_size=128Mquery_cache_limit=2Mquery_cache_min_res_unit=2kdefault-storage-engine=MyISAMdefault-tmp-storage-engine=MYISAM
thread_stack=192Ktransaction_isolation=READ-COMMITTED
tmp_table_size=128Mmax_heap_table_size=128Mlog-slave-updates
log-bin=/usr/local/webserver/mysql/binlog/binlog
binlog-do-db=oa_fb
binlog-ignore-db=mysql
binlog_cache_size=4Mbinlog_format=MIXED
max_binlog_cache_size=8Mmax_binlog_size=1Grelay-log-index=/usr/local/webserver/mysql/relaylog/relaylog
relay-log-info-file=/usr/local/webserver/mysql/relaylog/relaylog
relay-log=/usr/local/webserver/mysql/relaylog/relaylog
expire_logs_days=10key_buffer_size=256Mread_buffer_size=1Mread_rnd_buffer_size=16Mbulk_insert_buffer_size=64Mmyisam_sort_buffer_size=128Mmyisam_max_sort_file_size=10Gmyisam_repair_threads=1myisam_recover
#p#分页标题#e#
interactive_timeout=120wait_timeout=120skip-name-resolve#master-connect-retry=10slave-skip-errors=1032,1062,126,1114,1146,1048,1396#master-host=192.168.1.2#master-user=username#master-password=password#master-port=3306server-id=1loose-innodb-trx=0loose-innodb-locks=0loose-innodb-lock-waits=0loose-innodb-cmp=0loose-innodb-cmp-per-index=0loose-innodb-cmp-per-index-reset=0loose-innodb-cmp-reset=0loose-innodb-cmpmem=0loose-innodb-cmpmem-reset=0loose-innodb-buffer-page=0loose-innodb-buffer-page-lru=0loose-innodb-buffer-pool-stats=0loose-innodb-metrics=0loose-innodb-ft-default-stopword=0loose-innodb-ft-inserted=0loose-innodb-ft-deleted=0loose-innodb-ft-being-deleted=0loose-innodb-ft-config=0loose-innodb-ft-index-cache=0loose-innodb-ft-index-table=0loose-innodb-sys-tables=0loose-innodb-sys-tablestats=0loose-innodb-sys-indexes=0loose-innodb-sys-columns=0loose-innodb-sys-fields=0loose-innodb-sys-foreign=0loose-innodb-sys-foreign-cols=0slow_query_log_file=/usr/local/webserver/mysql/mysql_slow.log
long_query_time=1[mysqldump]quick
max_allowed_packet=32M
3、初始化数据库
[[email protected],ccmysql]#/usr/local/webserver/mysql/scripts/mysql_install_db–defaults-file=/etc/my.cnf–user=mysql
显示如下信息:
InstallingMySQLsystemtables…2015-01-2620:18:510[Warning]TIMESTAMPwithimplicitDEFAULTvalueisdeprecated.Pleaseuse–explicit_defaults_for_timestampserveroption(seedocumentationformoredetails).OKFillinghelptables…2015-01-2620:18:570[Warning]TIMESTAMPwithimplicitDEFAULTvalueisdeprecated.Pleaseuse–explicit_defaults_for_timestampserveroption(seedocumentationformoredetails).OK…
4、创建开机启动脚本
[[email protected],ccmysql]#cd/usr/local/webserver/mysql/[[email protected],ccmysql]#cpsupport-files/mysql.server/etc/rc.d/init.d/mysqld
[[email protected],ccmysql]#chkconfig–addmysqld
[[email protected],ccmysql]#chkconfig–level35mysqldon
4、启动mysql服务器
[[email protected],ccmysql]#servicemysqldstart

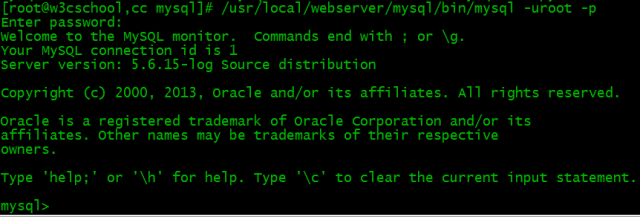
5、连接MySQL
[[email protected],ccmysql]#/usr/local/webserver/mysql/bin/mysql-uroot-p

修改MySQL用户密码
mysqladmin-u用户名-p旧密码password新密码
或进入mysql命令行
SETPASSWORDFOR'用户名'@'主机'=PASSWORD(‘密码');
创建新用户并授权:
grantallprivilegeson*.*to用户名@'%'identifiedby'密码'withgrantoption;
其他命令
启动:servicemysqldstart
停止:servicemysqldstop
重启:servicemysqldrestart
重载配置:servicemysqldreload
